
How to Install a Herringbone LVP Floating Floor Over Tile
This post is sponsored by ProCore Floors.
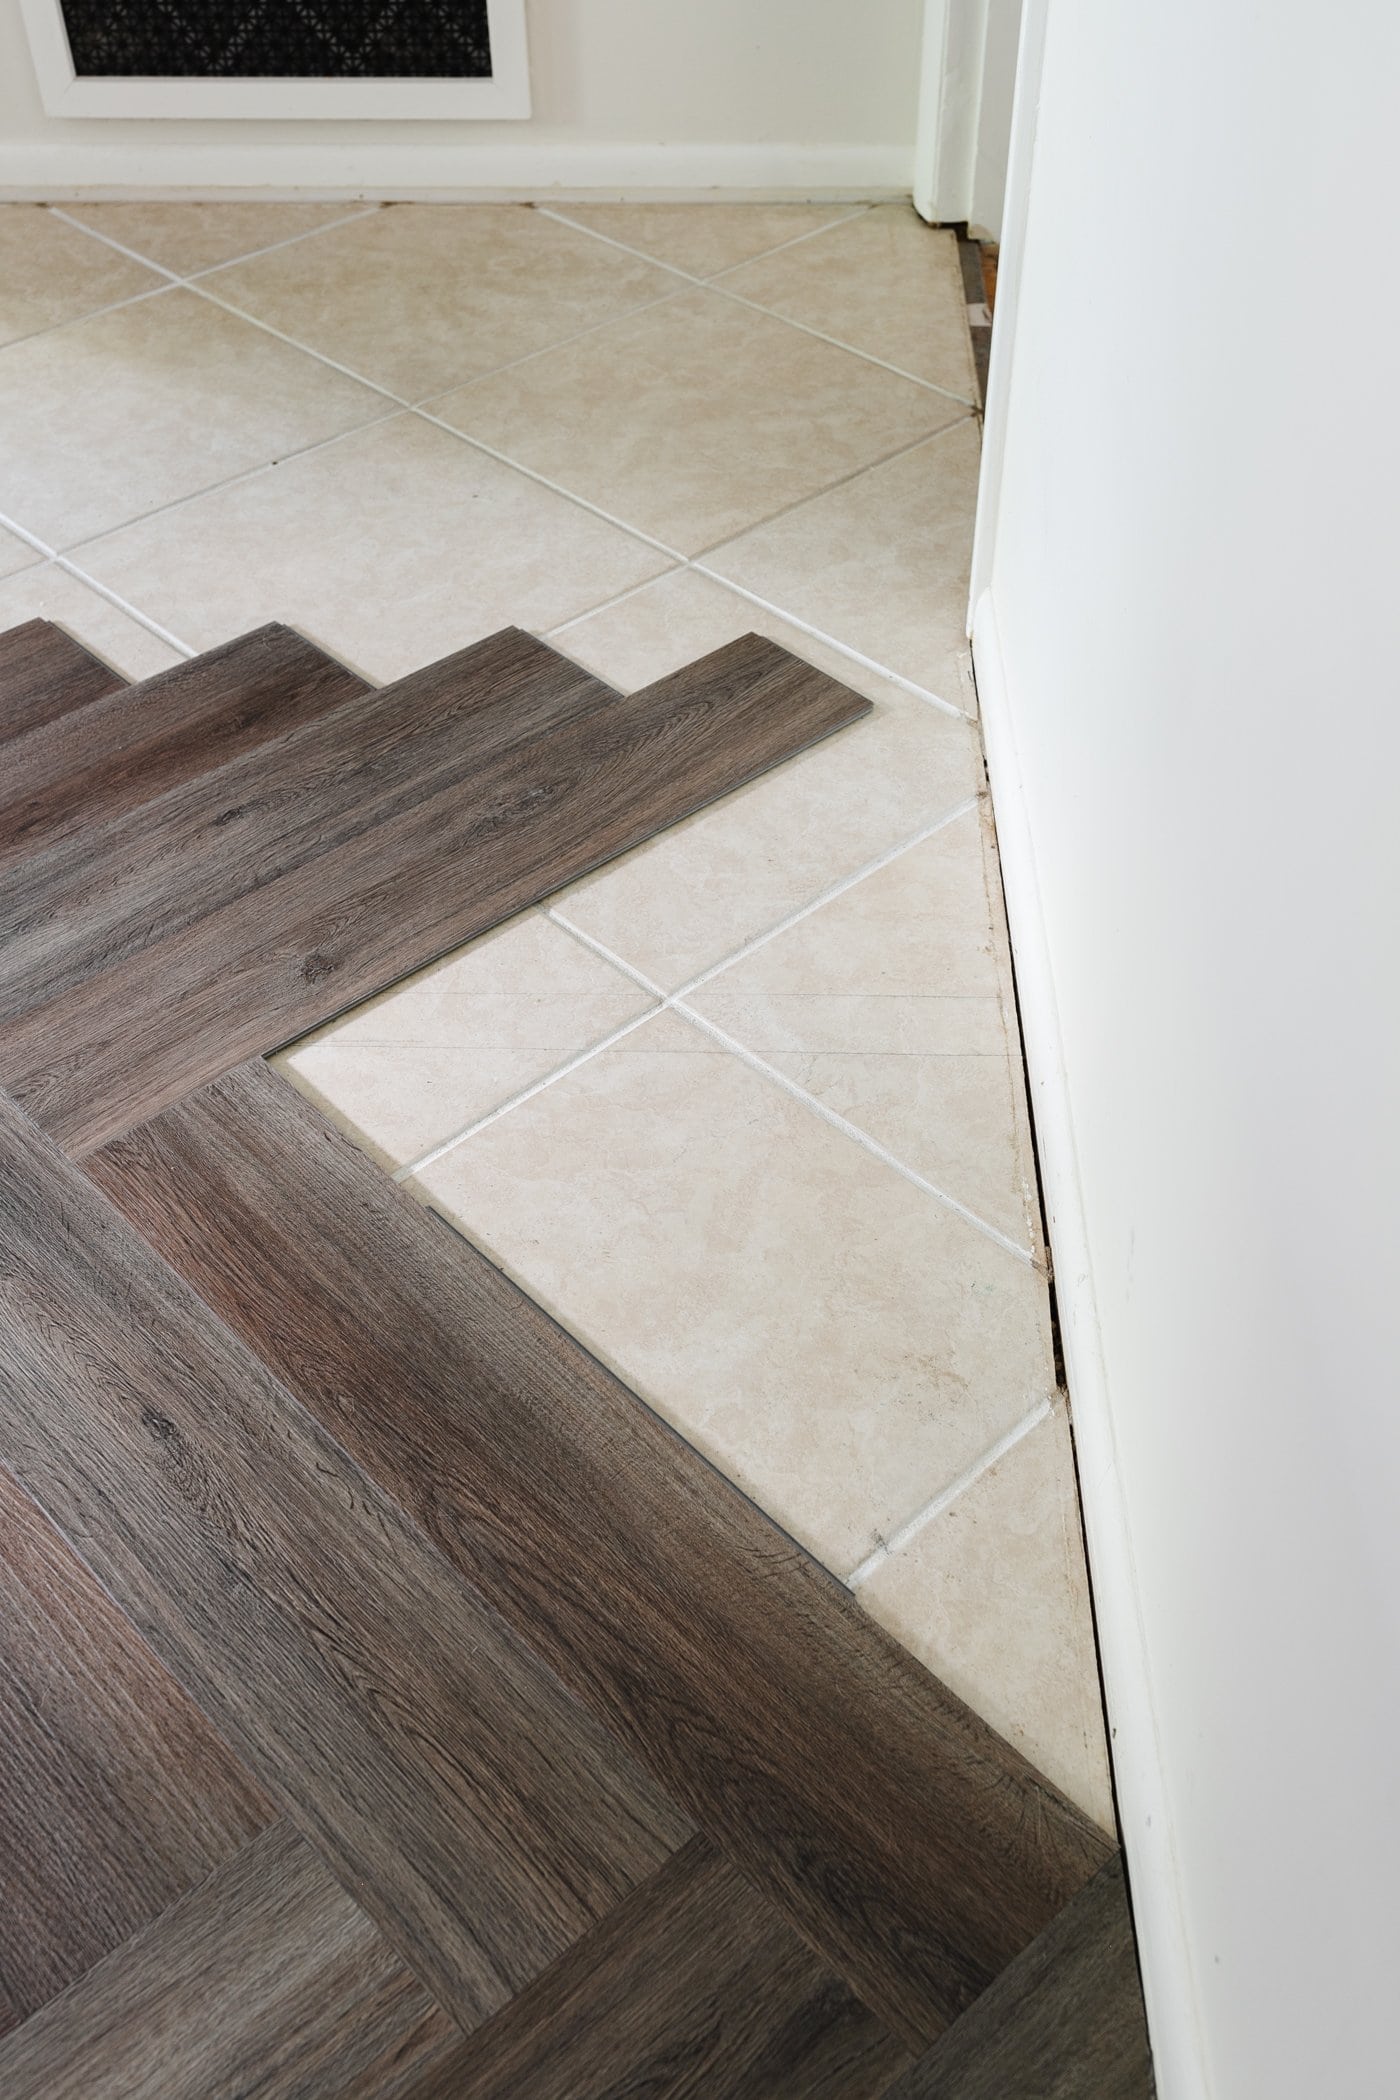
Everything you need to know to install an LVP herringbone vinyl flooring yourself as a floating floor over tile without demo to add a durable, high-end look to your home for less.
Bye bye old, beige tile and hello pretty herringbone floors!

Our breakfast nook and our kitchen got a major flooring “glow up” this past week, and I had no idea the massive difference just flooring alone could make to fix the feature I’ve despised for so long in this space… without the need for demo!

Everyone who has walked into our house since we finished it has said, “Woah! This floor is so cool!”
Why Choose Luxury Vinyl Plank Flooring
The herringbone pattern completely makes these rooms, and the luxury vinyl plank floor is much more durable and more cushioned under our feet than our original 60+ year-old hardwood floors. It most definitely is warmer than our freezing cold tile was.
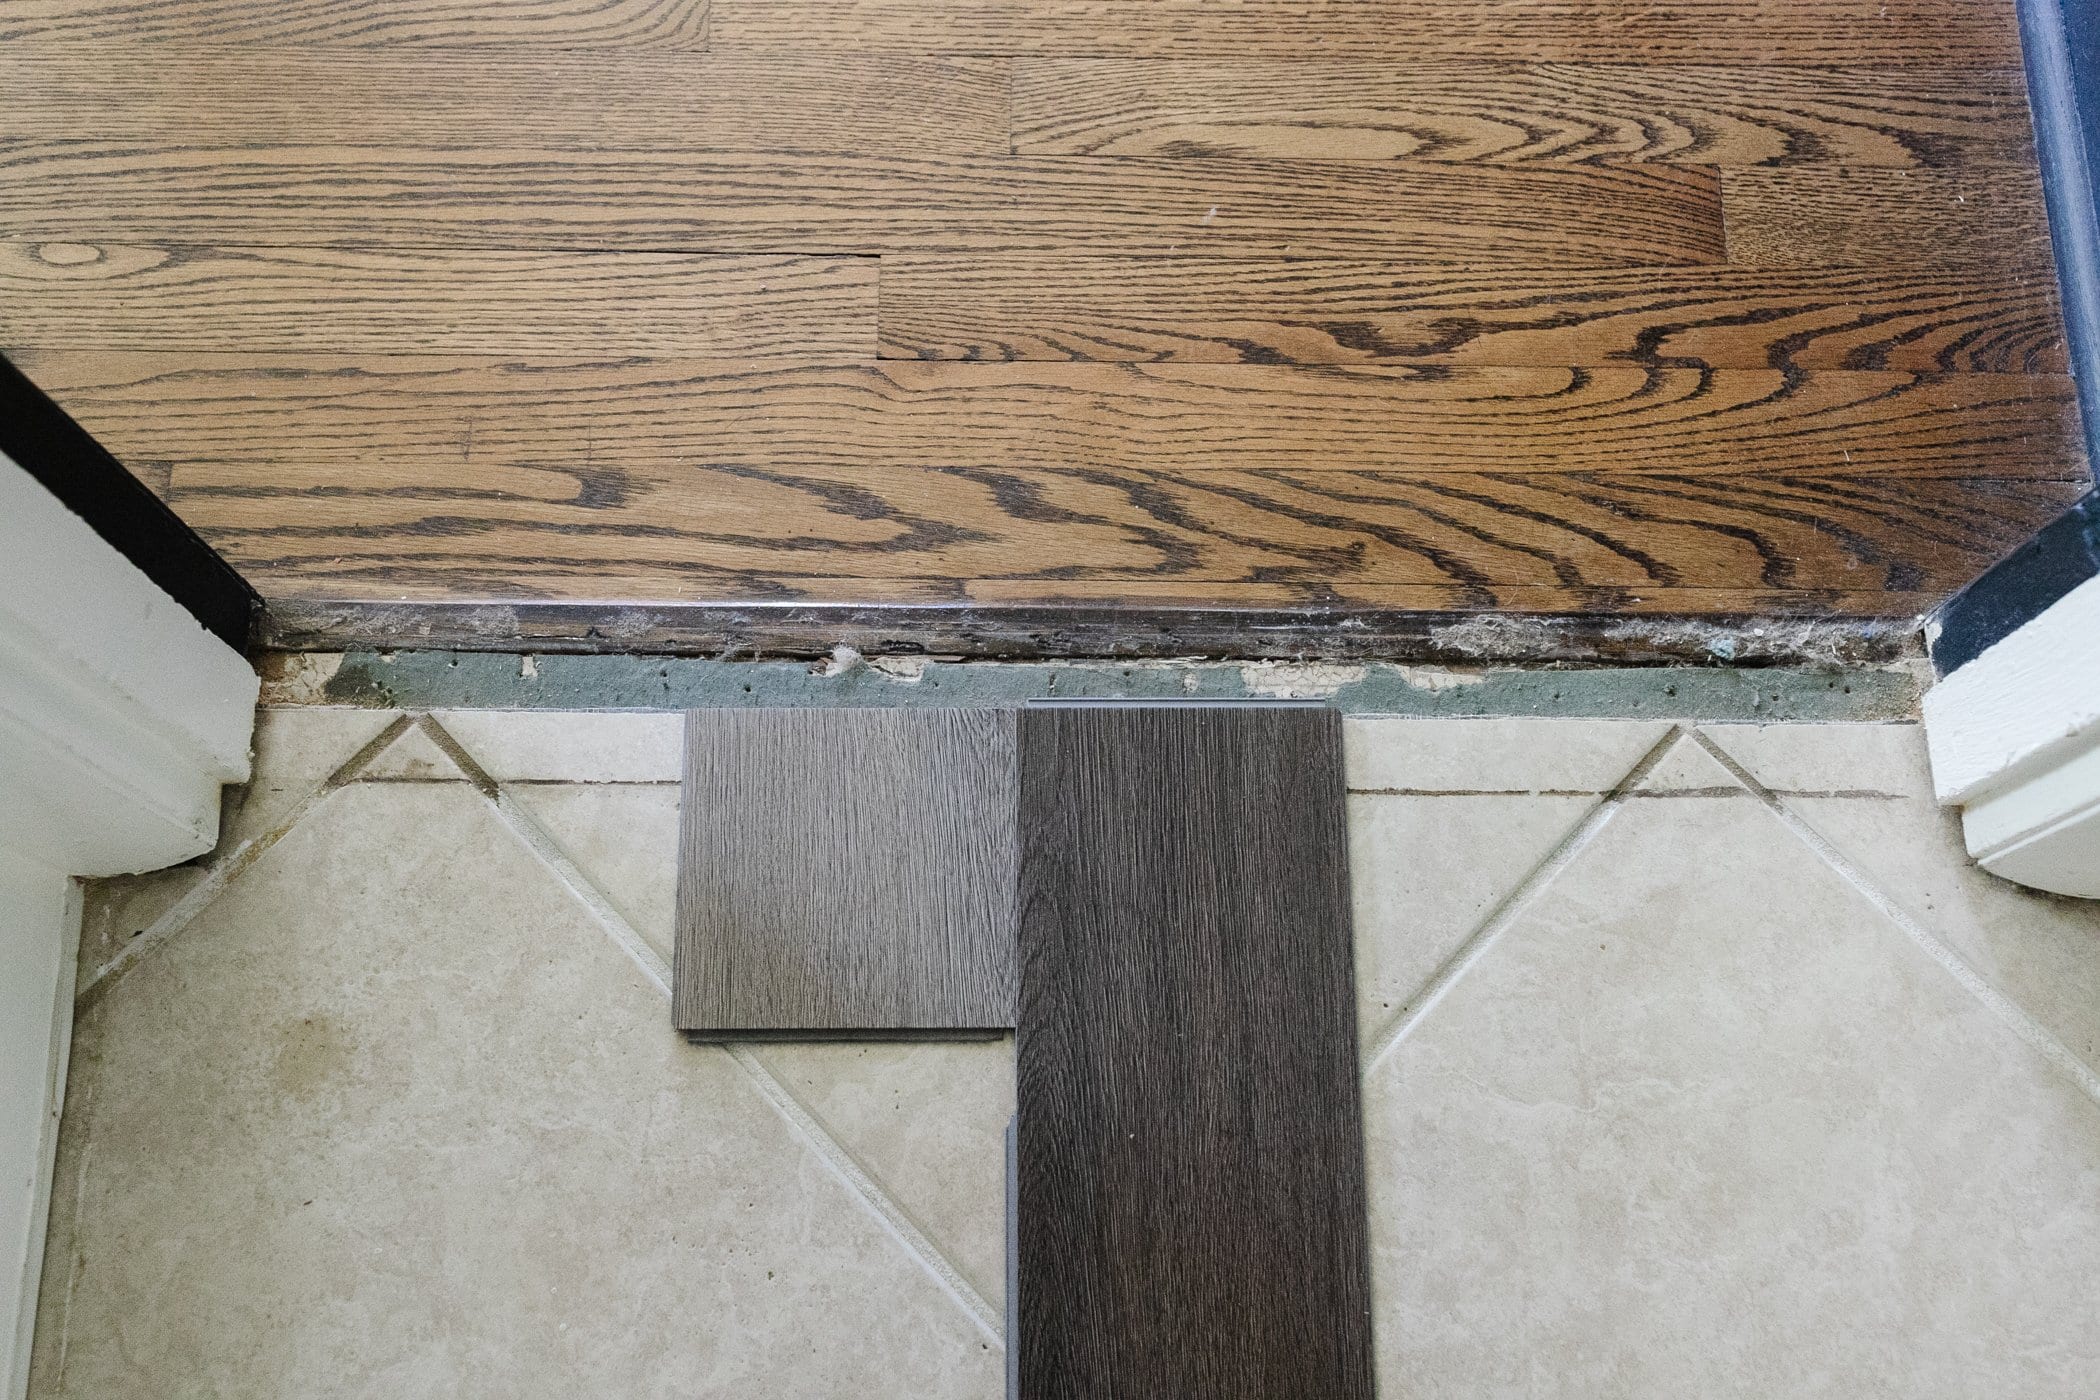
Because our breakfast nook and kitchen gets the most daily traffic and connects all of the other rooms of our downstairs, I wanted it to echo our home’s traditional style with the function of modern technology, so we chose the Brookewood Herringbone Luxury Vinyl Plank waterproof interlocking flooring from the two ProCore Floors colors at Lowe’s. (You can see them in person at your local store.)
For a slightly more modern, Scandinavian vibe, the lighter Ashewood color is beautiful too.
I love that these floors have a slight texture to create an even more convincing look of real wood planks.
The Benefits of an LVP Floating Floor vs Tile or Hardwood
We have used ProCore Floors before in our neighbors’ house when we installed it ourselves in their playroom for their 9 kids. And because we were so happy with its durability and ease of installation, we felt completely confident about using it in our kitchen area.
LVP Flooring Benefits:
- Waterproof
- Stain resistant
- Scratch resistant
- Durable
- Low maintenance
- Better sound absorption
- Holds up to kids, pets, and high traffic
- Easier to install than tile or hardwood floors
You can see how we installed regular luxury vinyl plank from ProCore Floors in our neighbors’ playroom here. It’s been over a year and, despite 9 kids and a dog constantly running all over it, the floor has held up perfectly!
So I was beyond excited when I found out about this herringbone vinyl floor option!

What is a Floating Floor?
A floating floor is an interlocking system similar to a puzzle where the locking floor materials create a tight bond without the need for glue or nails to attach it to a subfloor. Luxury vinyl plank flooring uses a tongue and groove or “click lock” system to snap planks together making it easy to install yourself.

When to Install a Floating Floor Over Tile
Normally, I would not suggest a floating floor over tile if you were hiring out a large room remodel.
But when you need a DIY flooring solution or are faced with budget/time constraints that make removing an old tile floor impossible, it’s a fantastic solution to add an upgrade in place of an eyesore.
However, not all LVP floors are created alike, so it’s important to use a flooring like this one from the ProCore Plus rigid core line that have a built-in cork underlayment rigid enough to be used as a floating floor over an old floor.
***When installing luxury vinyl flooring over tile, your tile should be debris-free and without cracks, holes, or raised texture.

Where You Can Install LVP Floating Floor:
- Old ceramic tile (that is still in good condition without any cracks or holes)
- Concrete
- Sheet vinyl flooring
- Particle board
- Hardwood floors
How to Install Herringbone LVP Floating Floor Over Tile
Supplies
- ProCore Plus Herringbone LVP Flooring (We used the color Brookewood.)
- Safety glasses
- Dust mask
- Work gloves
- HEPA filtered vacuum
- Rubber mallet
- Knee pads
- Utility knife
- 6ft and 1ft level or straight edge
- Speed square
- Chalk line
- Pencil
- Jigsaw with carbide blades
- Tape measure
- Oscillating multi-tool
- 5-N-1 flooring transitions
- Broom
- Pry bar
- Brad nailer gun (or hammer and brad nails)
- 6 mil polyethylene sheeting/moisture barrier (if installing over concrete)
Floating Floor Installation Method Steps
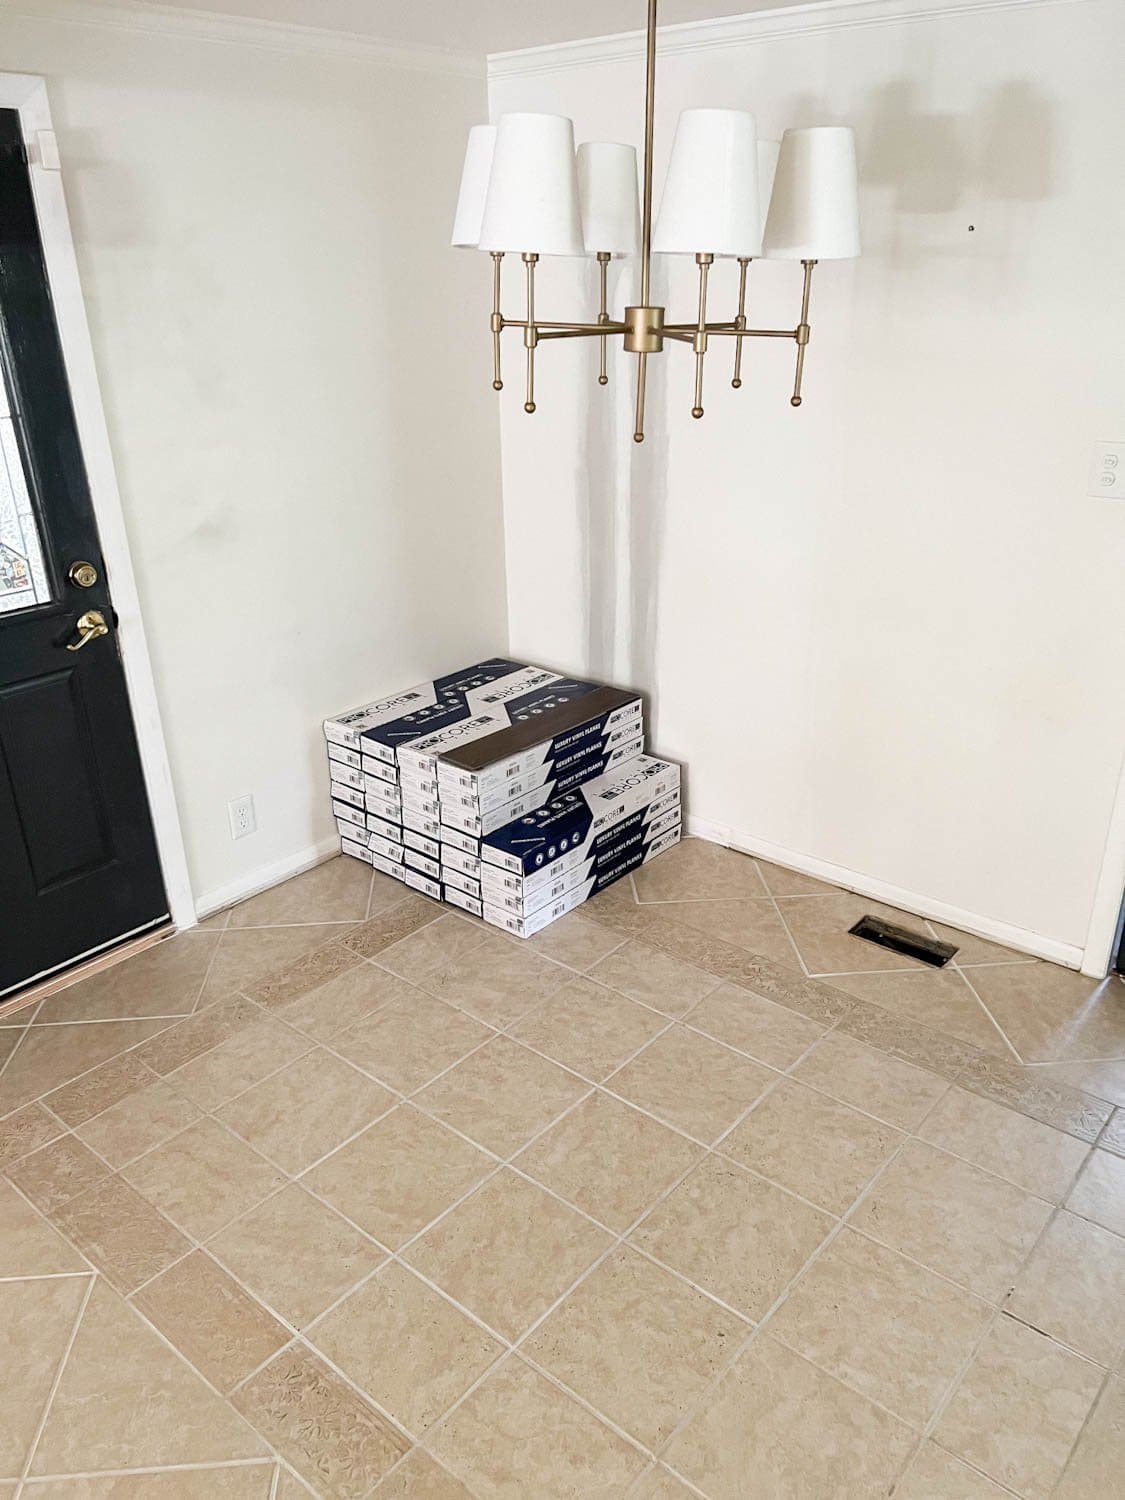
Step 1 Prep the space
Remove any shoe molding in the room before you start installation. Score the caulk line on shoe molding with a utility knife, gently pry them off the wall with a pry bar, and set aside. You can put them back after installation so you don’t have to buy new shoe molding.

Step 2 Undercut Door Jambs
Use an oscillating multi-tool to cut them to the height of your LVP flooring so the planks can slide underneath them.

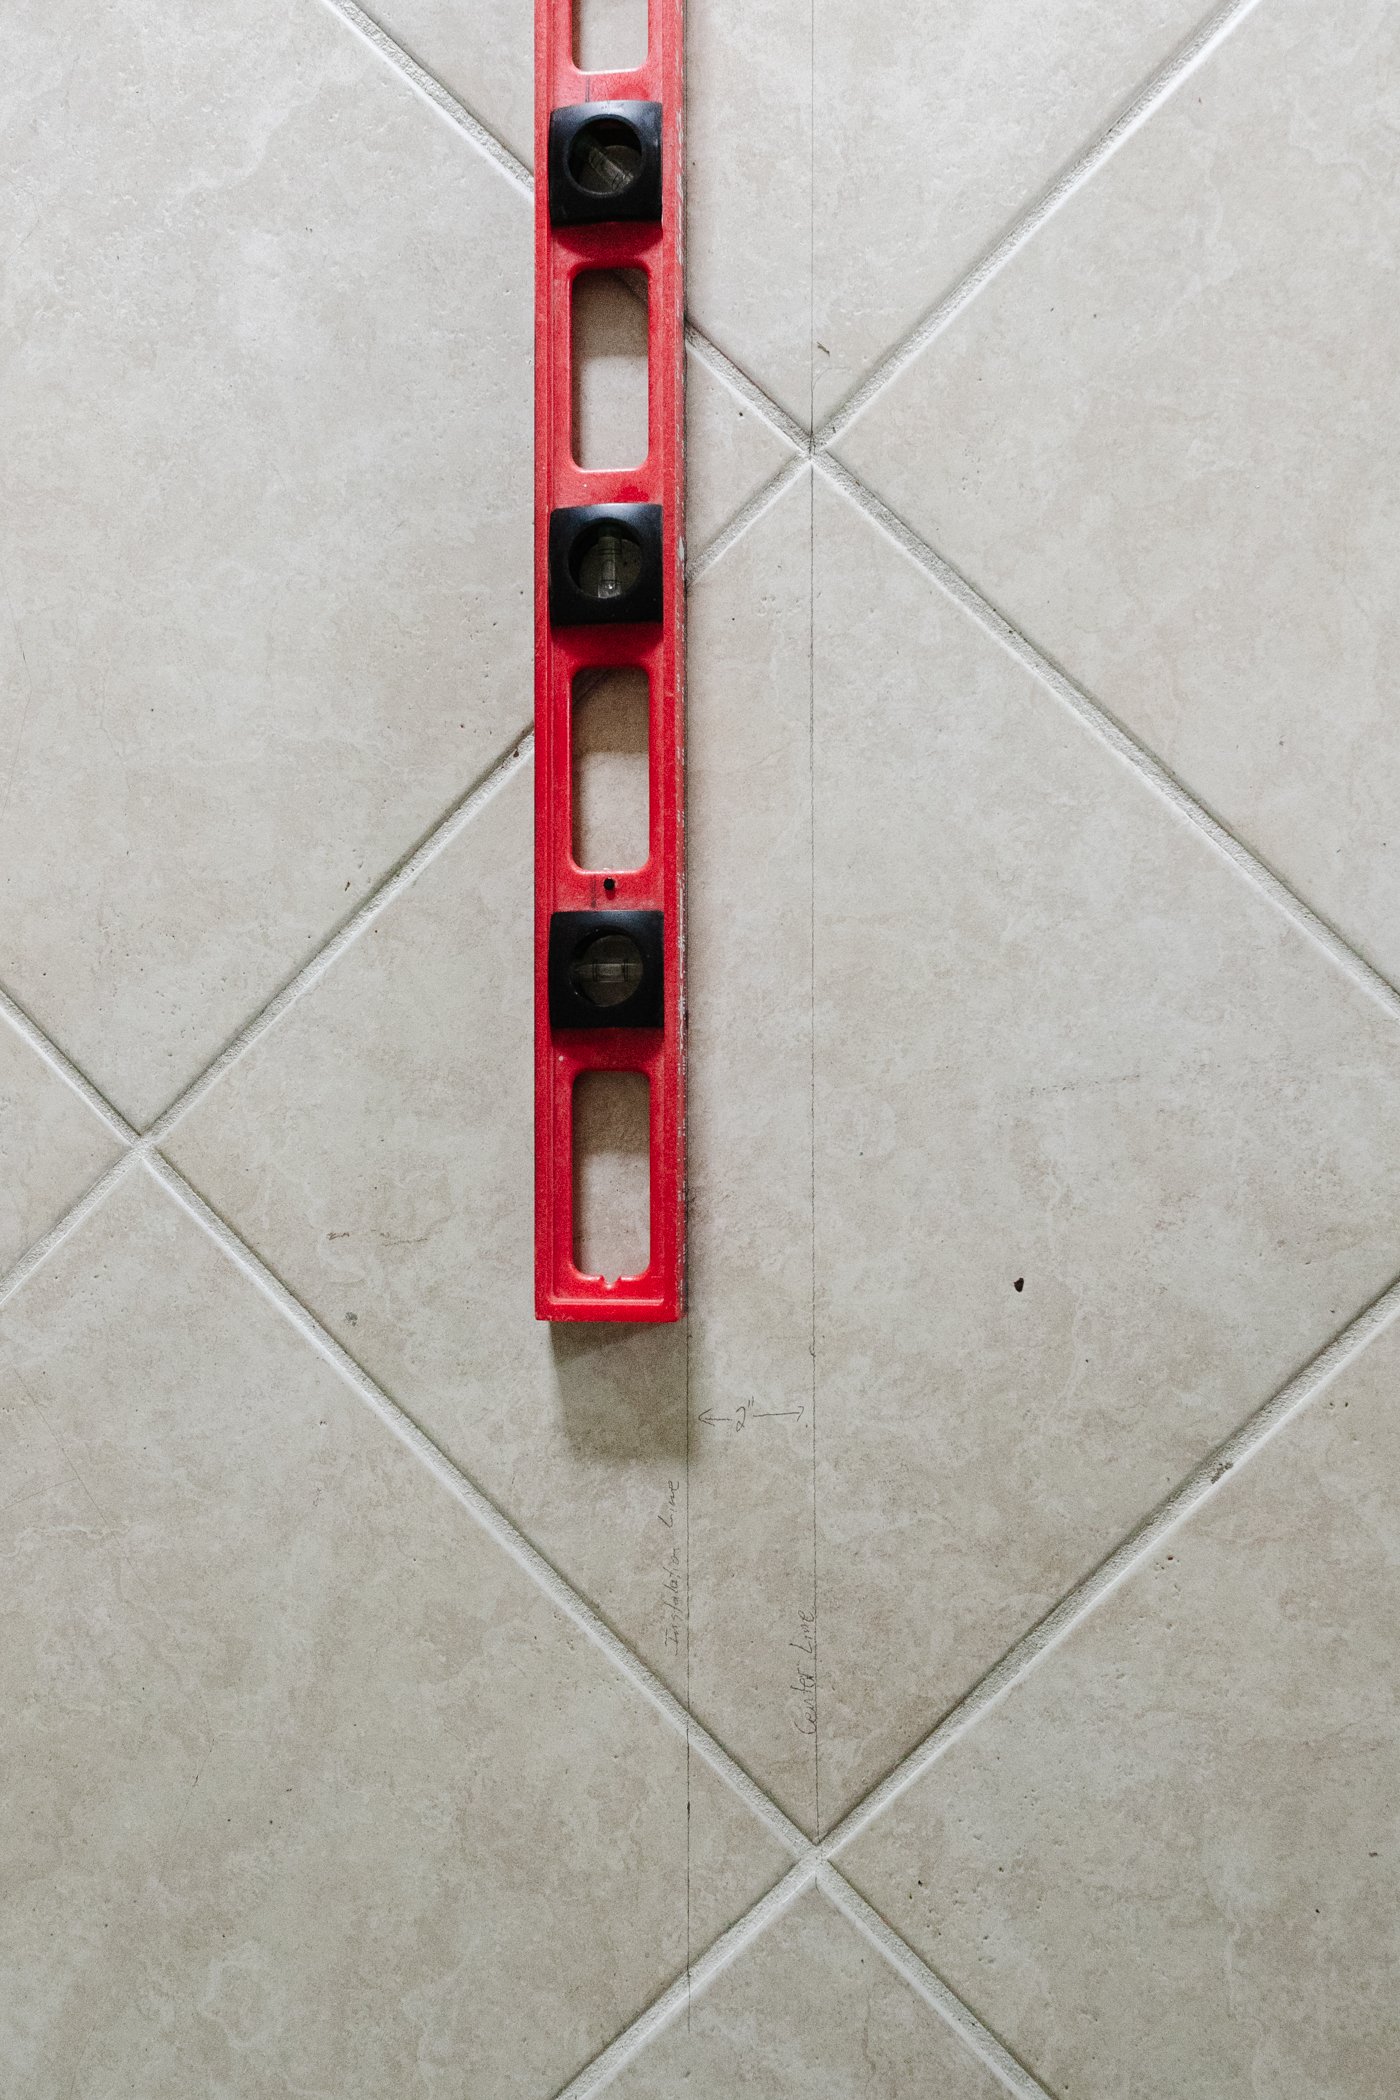
Step 3 Mark Your Starting Line
Starting on a clean, debris-free surface, decide on your layout first by choosing which direction you want your herringbone pattern.
Measure your space and mark the very center of the room.

Then, using a chalkline or straight edge and pencil, mark the very center line of the space.

Step 4 Mark A Second Line
After marking your center line, mark a second line 2 inches over from your center line. This will be your guide for your first row of herringbone planks.

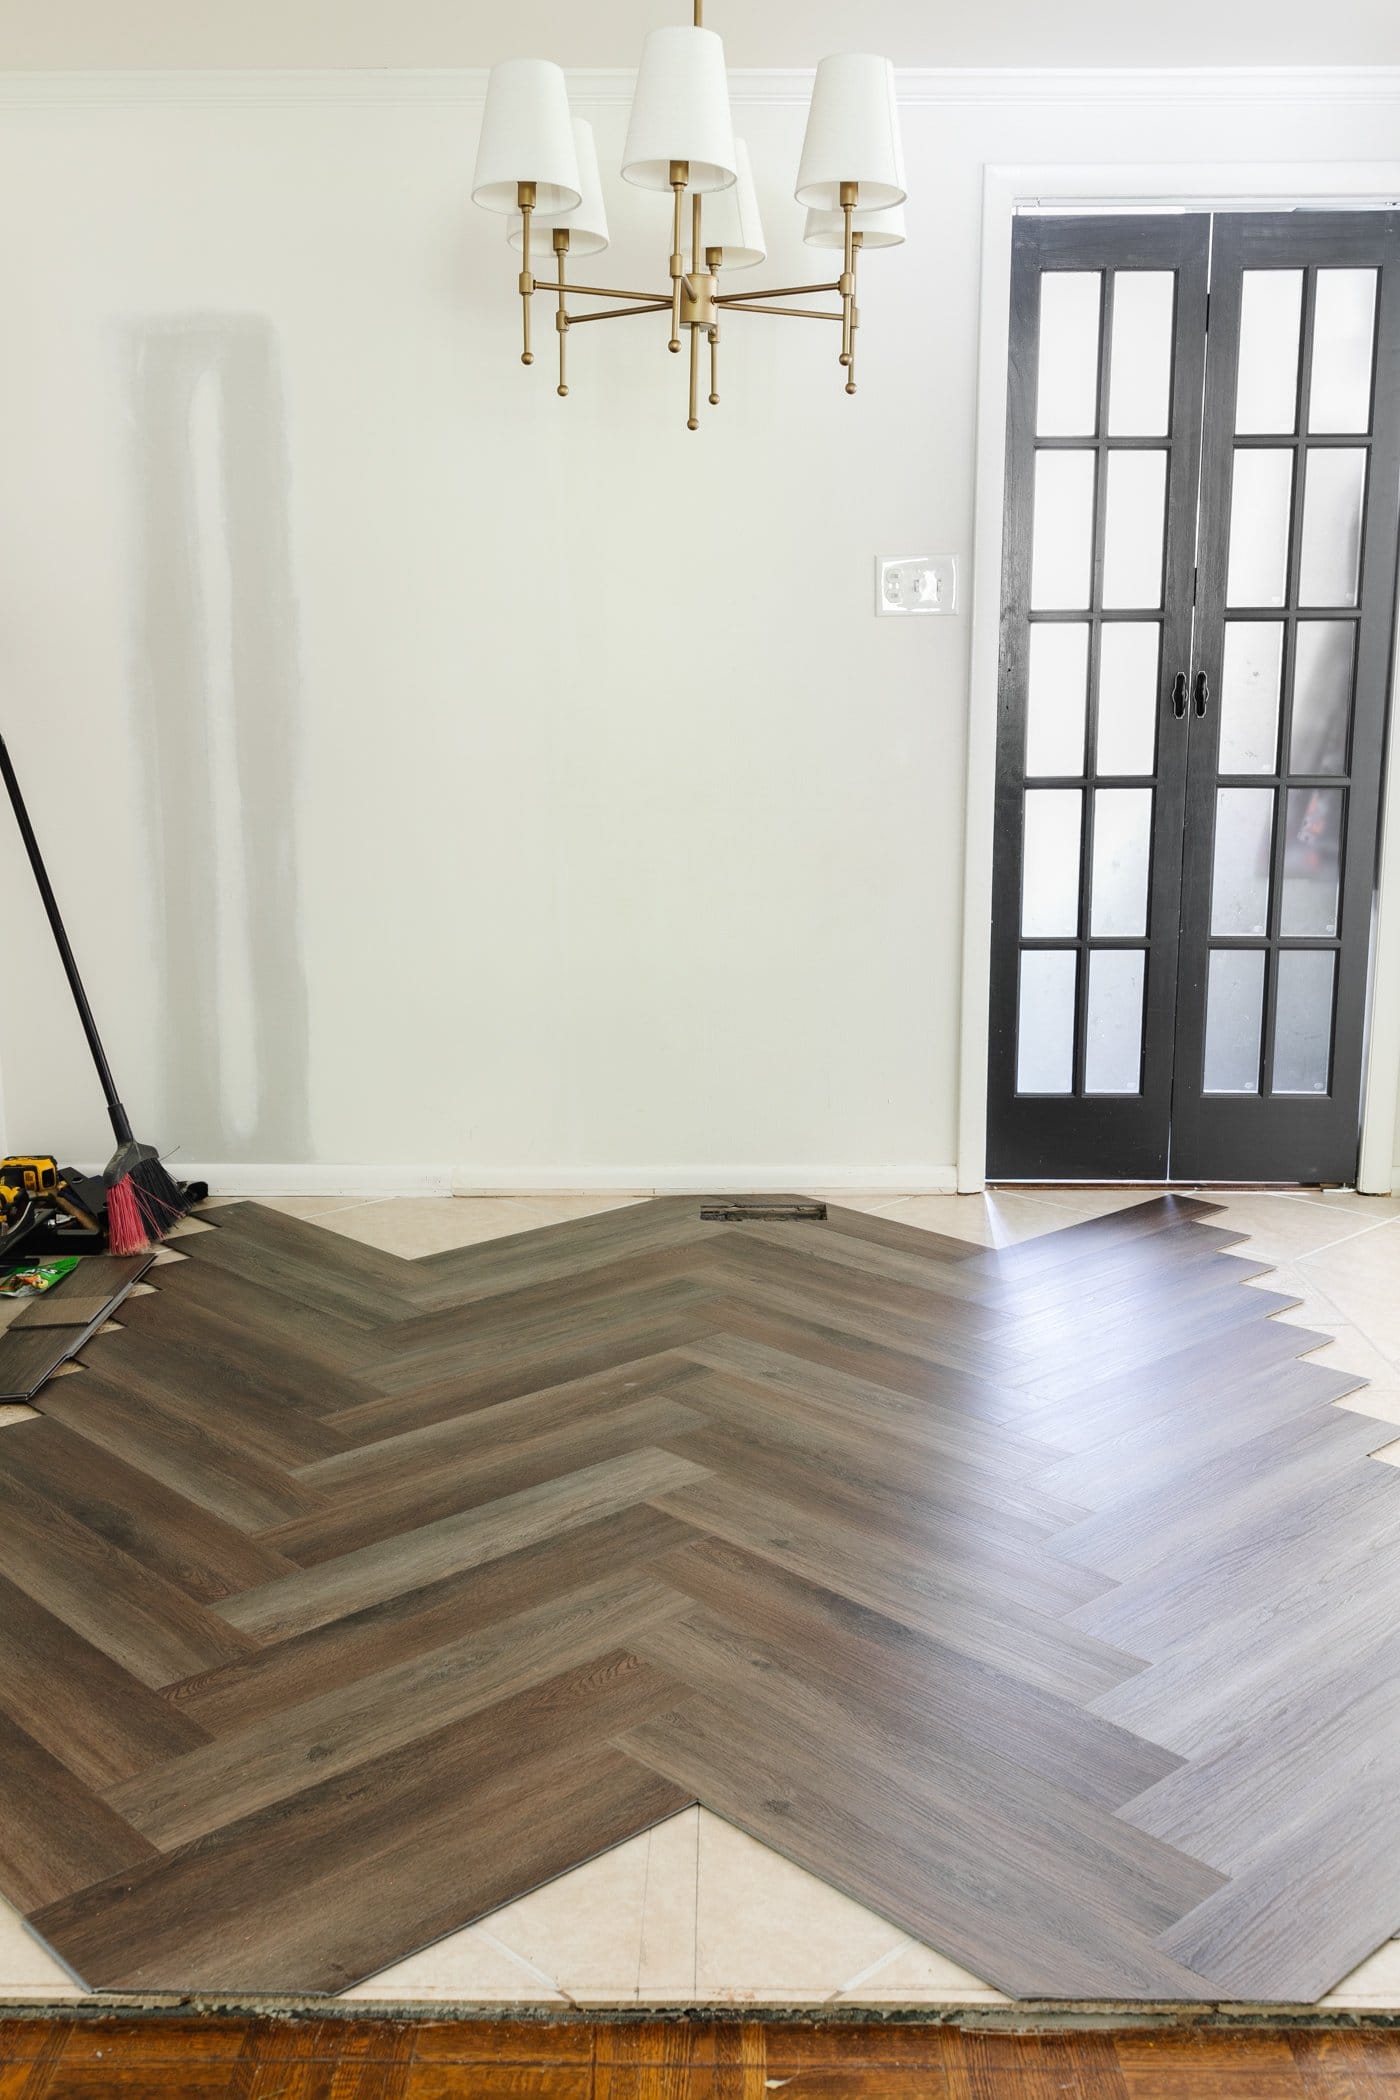
Step 5 Begin Placing Planks
Click together your first few planks, keeping the V-shape of the herringbone pattern in line with your markings.

Step 6 Click Seams Together
Use a rubber mallet and scrap piece of flooring (not a tapping block) to push planks together into a snug fit at the seams.
Step 7 Lock Seams
Then, lock the planks together by tapping the top of the seams with a rubber mallet.


Step 8 Vary Plank Patterns and Shades
As you lay planks, make sure you aren’t placing two matching ones side-by-side with the same pattern and shade. Pull planks from several boxes and place them into stacks. Pay attention to the planks you’re grabbing as you work to make sure none near each other look the same for a more natural variance.

Step 9 Repeat
Repeat the process of laying, clicking together, and locking full planks throughout the middle of the room.
Step 10 Begin Filling In Edges and Corners
As you finish filling in the middle of the room with planks, begin measuring and cutting pieces to fill edges and corners. This is the part that is much more challenging installing herringbone LVP versus the regular planks, but the end result is so worth it.

Step 11 Measure Edges
Use a tape measure to find the distance between a wall and a plank.

Step 12 Mark Plank Width
Use a spacer cut from a plank to mark the width. Measure that new line.

Step 13 Mark the Plank for Cutting
Use the measurements from Steps 11 and 12 to mark a new plank.

Step 14 Cut the Plank
Use a jigsaw to cut the plank where you marked the measurements on it in Step 13.


Step 15 Fill in the Rest of the Room
Continue filling all edges and corners by measuring and cutting planks as well as working around any obstacles like floor vents using the same method.
Step 16 Attach Transition Strips
In any doorways, snap transition strips into place for a clean transition between rooms.
Step 17 Attach Shoe Molding
Once all flooring is installed, reattach shoe molding onto baseboards to cover any rough cut edges in the floor’s perimeter. Use a finish nailer or hammer and brad nails to reattach shoe molding. Then, caulk and paint.

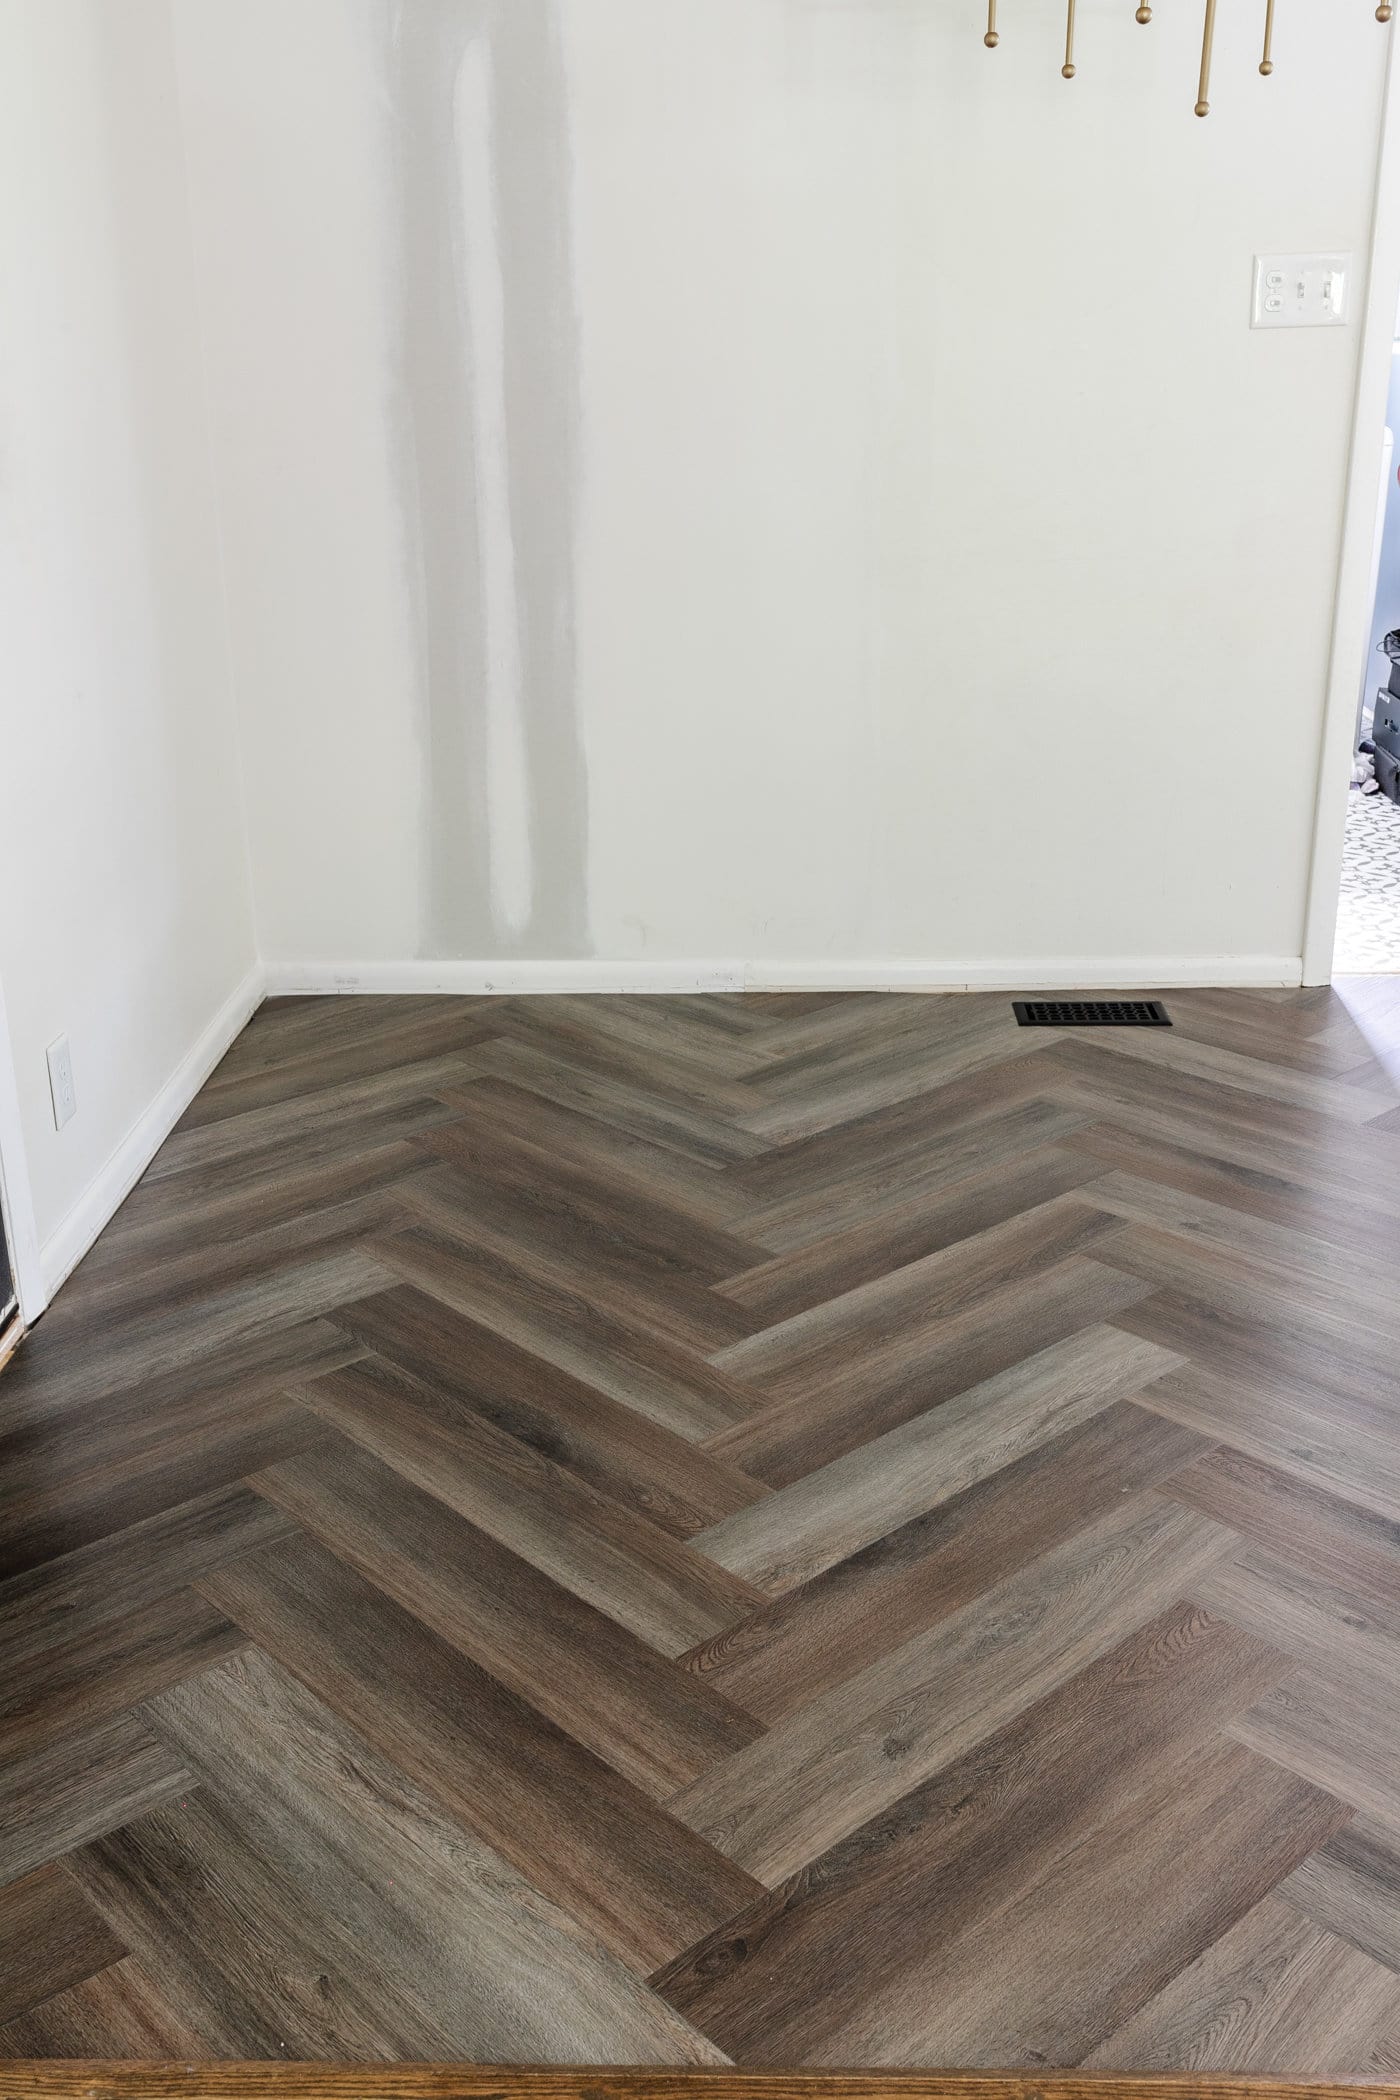
The Finished Herringbone LVP Floating Floor
Doesn’t it look a million times better than that old beige tile?! It feels like a brand new room with beautiful contrast now! That herringbone vinyl floor kicks it up a notch from the regular version.
And since it’s water resistant, I don’t ever have to worry about spills or a leaky dishwasher.
I really can’t believe it took us this long to make this change, and now I’m wondering why we didn’t tackle this project earlier. I love it so much!


We still have a lot more work to do in this breakfast nook like a banquette makeover and installation, chandelier replacement, table build, wall treatment addition… it’s going to be quite a journey.
But I can just see it in my head, and it’s absolutely gorgeous now that the old tile is outta here (or at least out of sight).
What do you think about the herringbone LVP floor decision? It was quite a bit more work than the regular LVP floating floor, but it totally paid off in my book.
More Flooring Ideas
- How to Install Luxury Vinyl Plank Flooring
- How to Install Sheet Vinyl Flooring Over Tile
- Marble Tile vs Marble Effect Tile: Which Is Best?
- Everything You Need to Know to Refinish Hardwood Floors
- DIY Moroccan Vinyl Peel and Stick Tile Floor

The post How to Install a Herringbone LVP Floating Floor Over Tile appeared first on Bless'er House.