Eggcellent Adventures: The (Eggstremely) Fine Art of Carving Eggshells
If you happened to read our recent feature article on the eggstraordinary creations carved by egg artists, chances are you’re wondering how the magic happens. If this is your introduction to this delicate craft, hopefully just reading this article’s title has piqued your interest. To further egg you on — well, just keep reading!
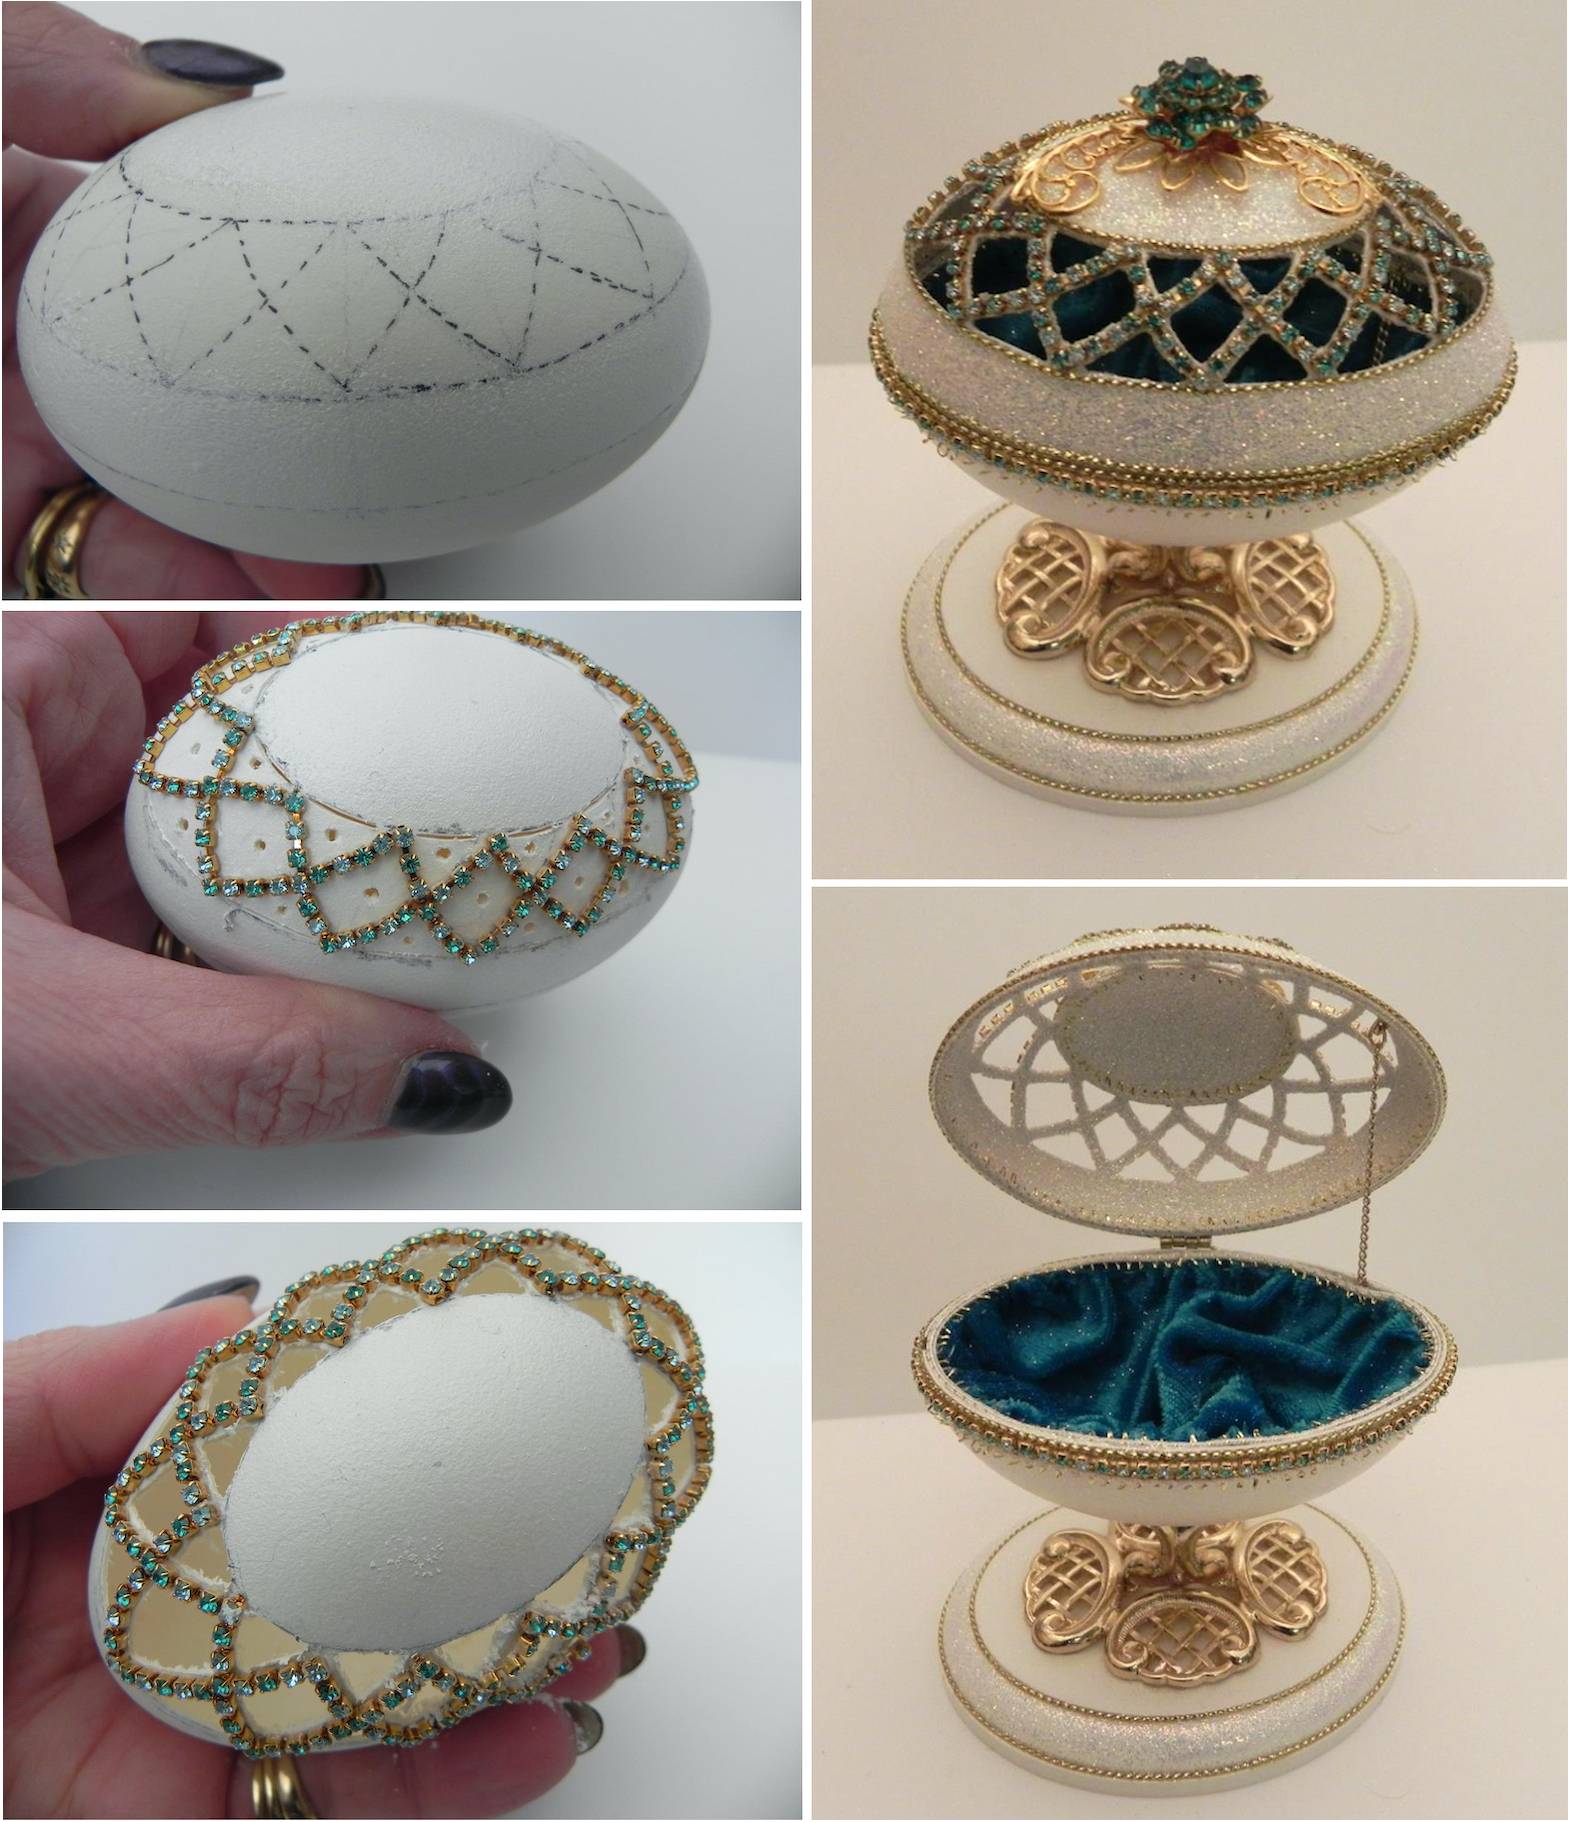
Photo credit: lindamartineggdesigns.com
First of all, egg artists use only infertile eggs sustainably sourced from domesticated birds. They’re not roaming through forests robbing cuckoo’s nests or otherwise swiping the best-laid output of fowls in the wild. So you can enjoy practicing this craft with a clear conscience.
As for artistic possibilities, eggs are literally open-ended when it comes to creating art. That’s because unless you are hard-boiling Easter eggs for later dyeing, the first step in creating egg art is to empty the egg of its contents. Needless to say, breaking it open in the usual fashion is not an option; instead, use a darning needle, thumbtack, or other thin, sharp-pointed implement to carefully poke a hole in the top of your egg. (One eHow tutorial even suggests using a hammer and a very slender nail for this!)
To make the shell less liable to crack when you poke your hole, first place a small square of cellophane or masking tape over the end of the egg. It is best to have your egg at room temperature for this procedure.
Once you’ve got the top hole in place, turn your egg over and poke a hole in its bottom as well. Once you’ve done the initial piercing, gently rotate your needle, thumbtack, or whatever tool you’re using to gradually widen the hole so that it’s a bit bigger than the one at the top — about a quarter of an inch in diameter.
Now comes the fun part. Techniques differ slightly, but basically, you’re going to blow out the egg’s innards. Start by taking a straightened paper clip or toothpick, sticking it into one of the holes, and wiggling it around to pierce the unseen yolk and scramble it with the egg white. Then do the same thing via the other hole. Don’t be too heavy-handed, or you’ll have to start over with a new egg!
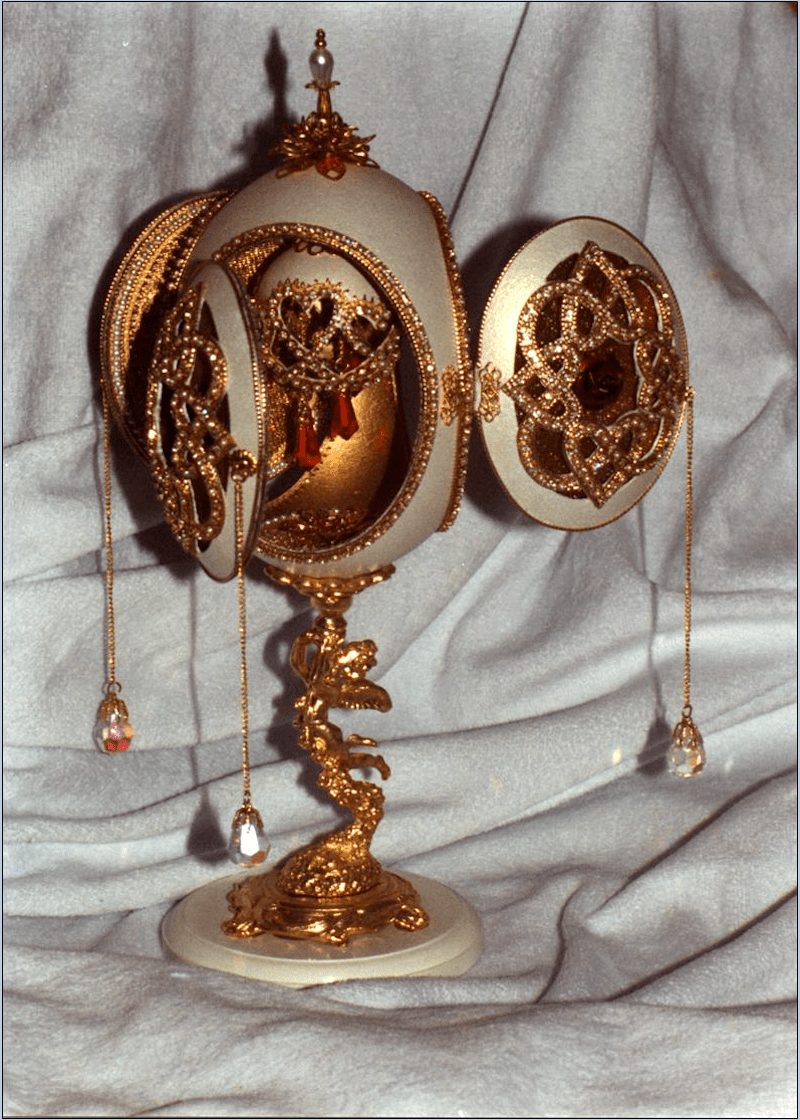
Photo credit: lindamartineggdesigns.com
Next, use your mouth — with or without a straw – or a baby’s ear syringe to blow forcefully (but not too forcefully) into the hole at the top of the egg, holding it upright so that the mixed-up yolk and white can flow out through the bottom hole. Catch the scrambled egg in a bowl, and refrigerate it to cook with later. Rinse out the empty shell, set it upright to drain, and let it dry overnight.
It’s best to prepare several eggs at a time, so you have spares on hand in case you break any (and you will!). Says award-winning self-taught egg artist Linda Martin, “Of course we all manage to break an egg now and again. We wouldn’t be human if we didn’t make mistakes. However, you do learn, quite quickly, how best to handle the egg.”
“Eggshells are stronger than you think,” continues the internationally known egg art educator and longtime International Egg Art Guild judge. “They do, after all, protect a living, growing creature from harm until it’s ready to survive on its own.”
Now that you’ve got a dry, clean, hollow egg prepared, it’s time to let your creativity flow! Explains Martin, “The overriding thing about egg art is that whatever technique you choose to use, be it applied decoration, hand painting, acid etching, pysanka, etc., your imagination and physical ability to carry out the work are the only limitations. Other than a few basic techniques, which can be acquired over time, you can do whatever you like, and no one can tell you it’s wrong!
“Every single person will have a different interpretation of an idea, making it such a wonderful medium for self-expression,” concludes the creator of several Best in Show art eggs.
Indeed, the egg’s smooth oval contours and empty, unblemished surface make it an appealing blank canvas that fairly cries out for decoration. But while it’s one thing to embellish the outer surface, actually cutting into the delicate shell is not for those afraid to break a few eggs en route to creating an omelet (metaphorically speaking).
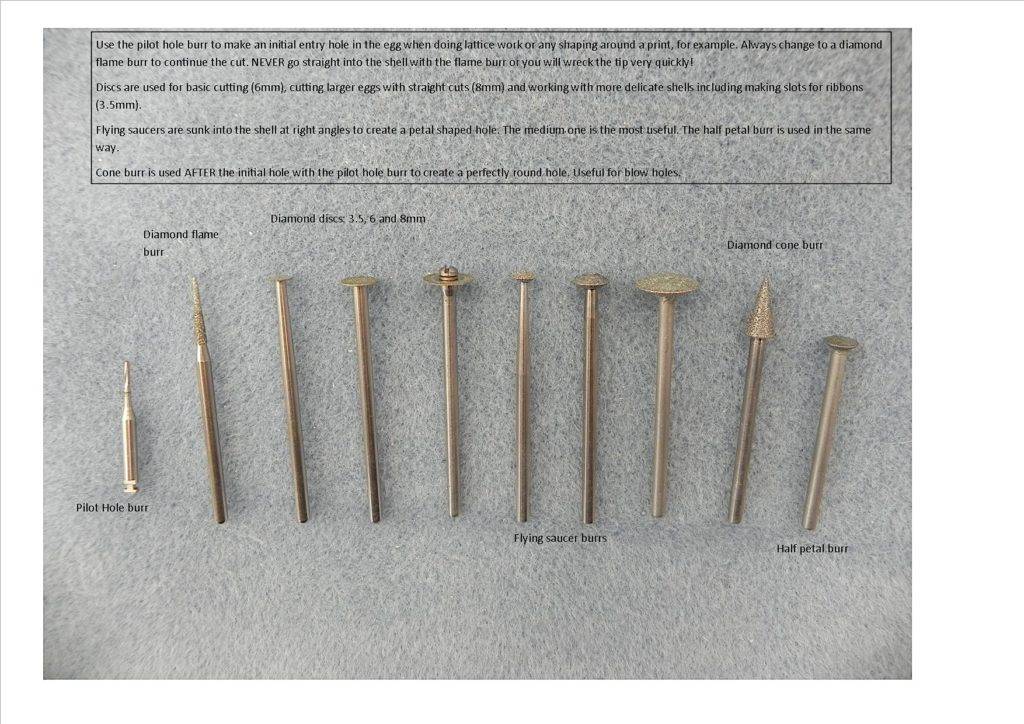
Photo credit: lindamartineggdesigns.com
For one thing, carving involves power tools: diamond-tipped drills (think dentist); a rotary tool called a Dremel; and high-speed engraving tools. First, the design is drawn onto the egg with a fine-pointed engineer’s pencil. If the egg is to be acid etched, the design is overlaid in wax via a special stylus called a kitska.
Then the egg is gently placed in an acid bath such as ordinary household vinegar. The vinegar reacts with the calcium in the eggshell and breaks it down, allowing the outer layer of the eggshell to be rubbed off, thus revealing the under-layer. In the case of a brown egg, which has a white under-layer, acid etching adds a lovely color contrast. The parts of the eggshell protected by wax remain as raised elements in the overall design.
Piercing the shell in any way, however, takes the art of the egg to a whole ‘nother level. Martin says, “Most eggs, once cut apart, are more at risk of breakages simply because the integrity of that egg shape no longer exists. This is the reason that all intricate cutwork on the egg is carried out before opening up any larger areas on the egg.”
There are ways to strengthen the eggshell so as to minimize the risk of breakage, but using power tools on hollow eggs still requires extremely fine motor skills. All egg artists wear protective glasses because the process generates lots of dust and flying microscopic shell shards; many wear magnifying headsets that cover their eyes. As Martin puts it, “the rule of thumb is to handle your piece of egg art as you would a piece of porcelain.”
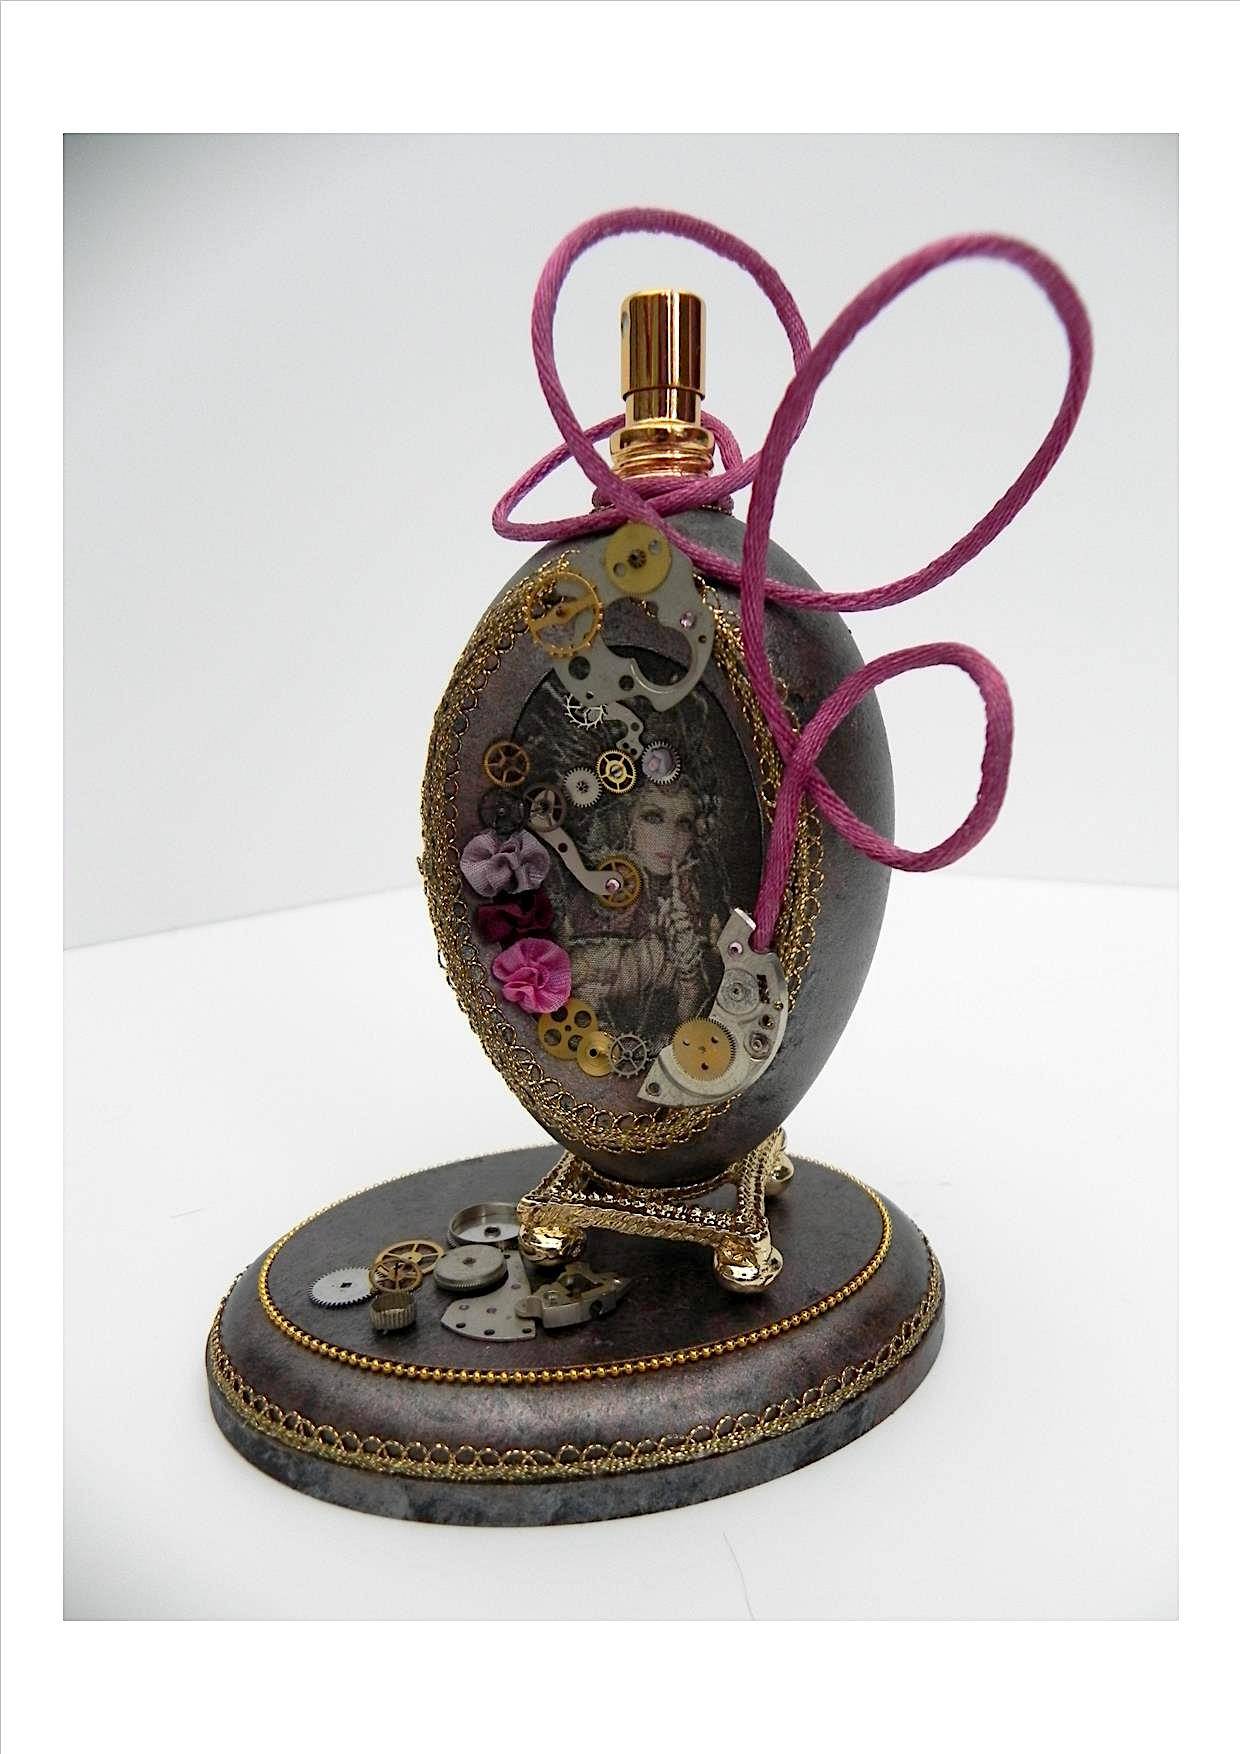
Photo credit: lindamartineggdesigns.com
For Martin, egg carving has a meditative quality. “I love cutting very small petal-shaped latticework. The gradual grinding away of the shell, using a fine drill bit coated in diamonds, to produce a perfectly shaped hole in the egg is, for me, very relaxing,” notes the artist. “And the challenge of then repeating that over and over, knowing that the slightest slip of concentration will result in starting all over again with a new egg, is something that gives [me] a feeling almost of serenity as I work.”
The inherent fragility of egg art is part of its innate appeal, believes Martin, who goes on to say, “The workmanship that goes into each piece should be valued not only in the time taken to produce it but the skill of the artist in handling something with such care at every stage of its creation to produce something of beauty.”
Another eggscellent self-taught egg artist is Attila Szabo, a retired Hungarian diplomat whose egg art journey began serendipitously: While surfing the internet in search of information to help his wife fulfill a long-held desire to learn how to etch glasses and bottles, he stumbled upon some pictures of egg carving.
For Szabo, it was love at first sight. Borrowing the Dremel he had bought for his wife, he discovered a hitherto unsuspected talent and outpouring of creativity. For inspiration and know-how, he studied the egg art of masters in the field. Starting with the most readily available eggs — those from hens — he gradually worked his way up to trying goose eggs, then ostrich and emu eggs.
Along the way, he acquired both technical skills and new tools. Exults the artist, “After getting a dental handpiece, a new chapter started in my eggshell carving. It was first on goose eggs that I tried to carve more delicate patterns and test not only the capabilities of my working material, i.e. the quality of the shell but also my hands.
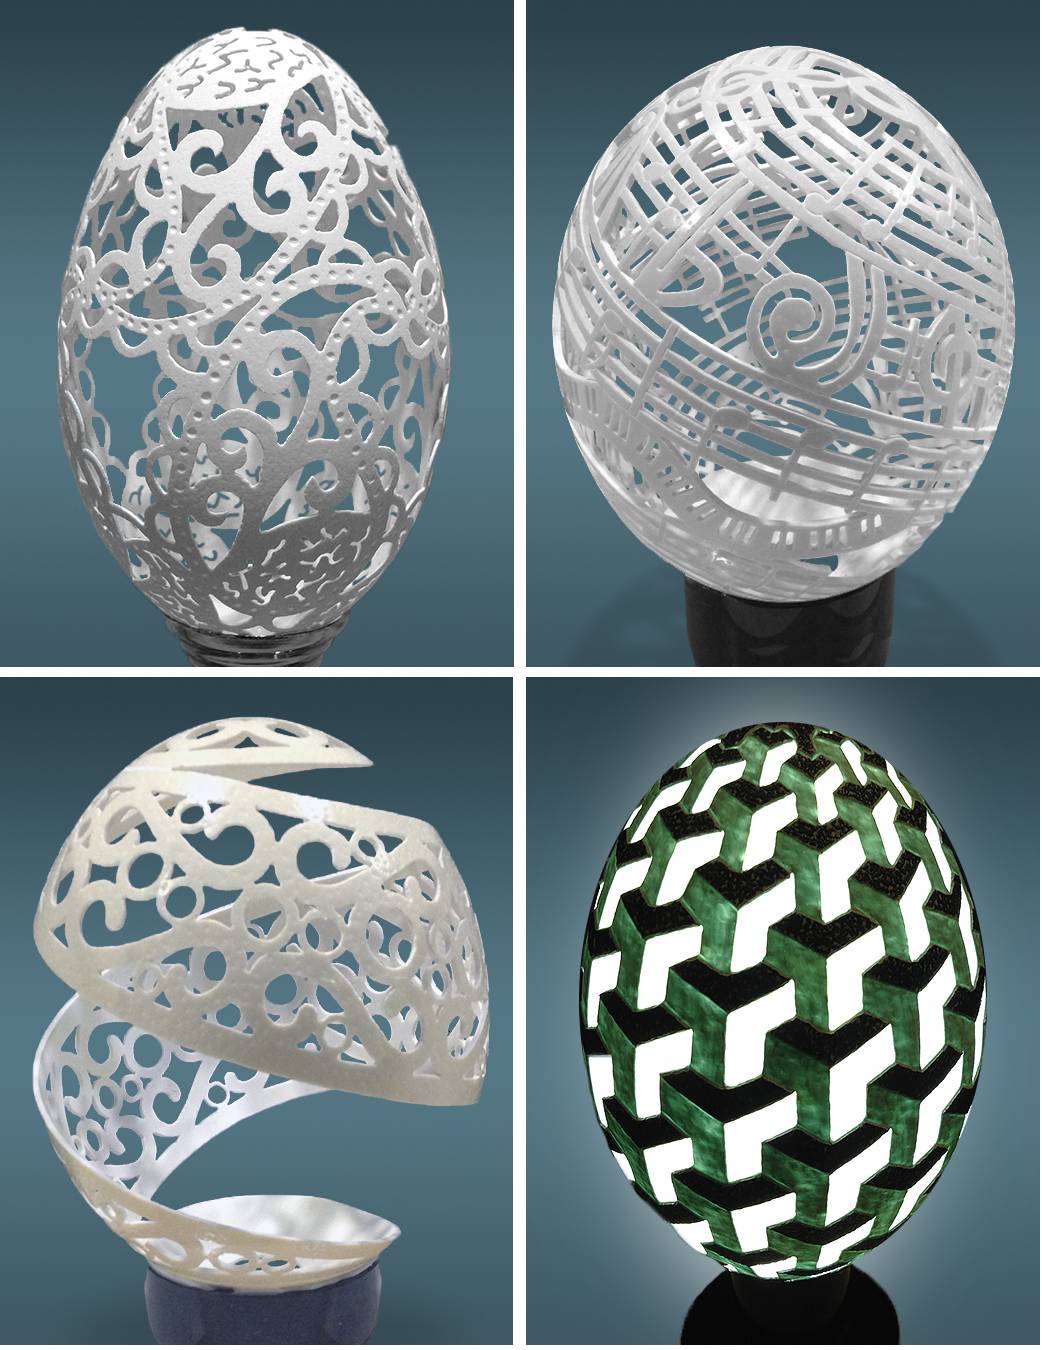
Photo credit: eggtailor.com
“What a change and joy!” he recalls. “I still use the Dremel to carve ostrich eggs but with the dental drill, a door opened to me in trying more and more complicated lines and compositions. During the carving and burnishing the emu eggshells it was a great pleasure to discover the beauty and the sensitivity of the different layers of the shell.”
Emu eggs add literal dimension to the carver’s designs because their shells have three distinct and discretely [Yes, I mean “discretely”, NOT “discreetly”! – BB] colored layers: The exterior is a mottled dark green, while the interstitial layer is blue, and the under-layer is a creamy white.
Says Szabo, “During the carving and burnishing of the emu eggshells, it was a great pleasure to discover the beauty and the sensitivity of the different layers of the shell.”
Viewing this retiree’s ethereal creations at EggTailor.com, you realize that it’s never too late to learn this eggmazing craft. Luckily for you, there are plenty of egg-carving tutorials on YouTube. The most user friendly of these probably are the videos linked from the Online Learning page at LindaMartinEggDesigns.com.
Linda Martin is the author of several books as well as publisher of The Art of the Egg Shell magazine. For her, “one of the pleasures I personally gain from egg art is in the teaching. There is nothing more satisfying than watching someone achieve something they didn’t think possible!”
Her advice to novice egg carvers? “Just cut on in there, keep cutting, and don’t look back!”
You’ll no doubt break a few eggs as you move along the egg-carving learning curve — maybe even more than a few — but look on the bright side: You can always make another omelet. Now…get cracking!
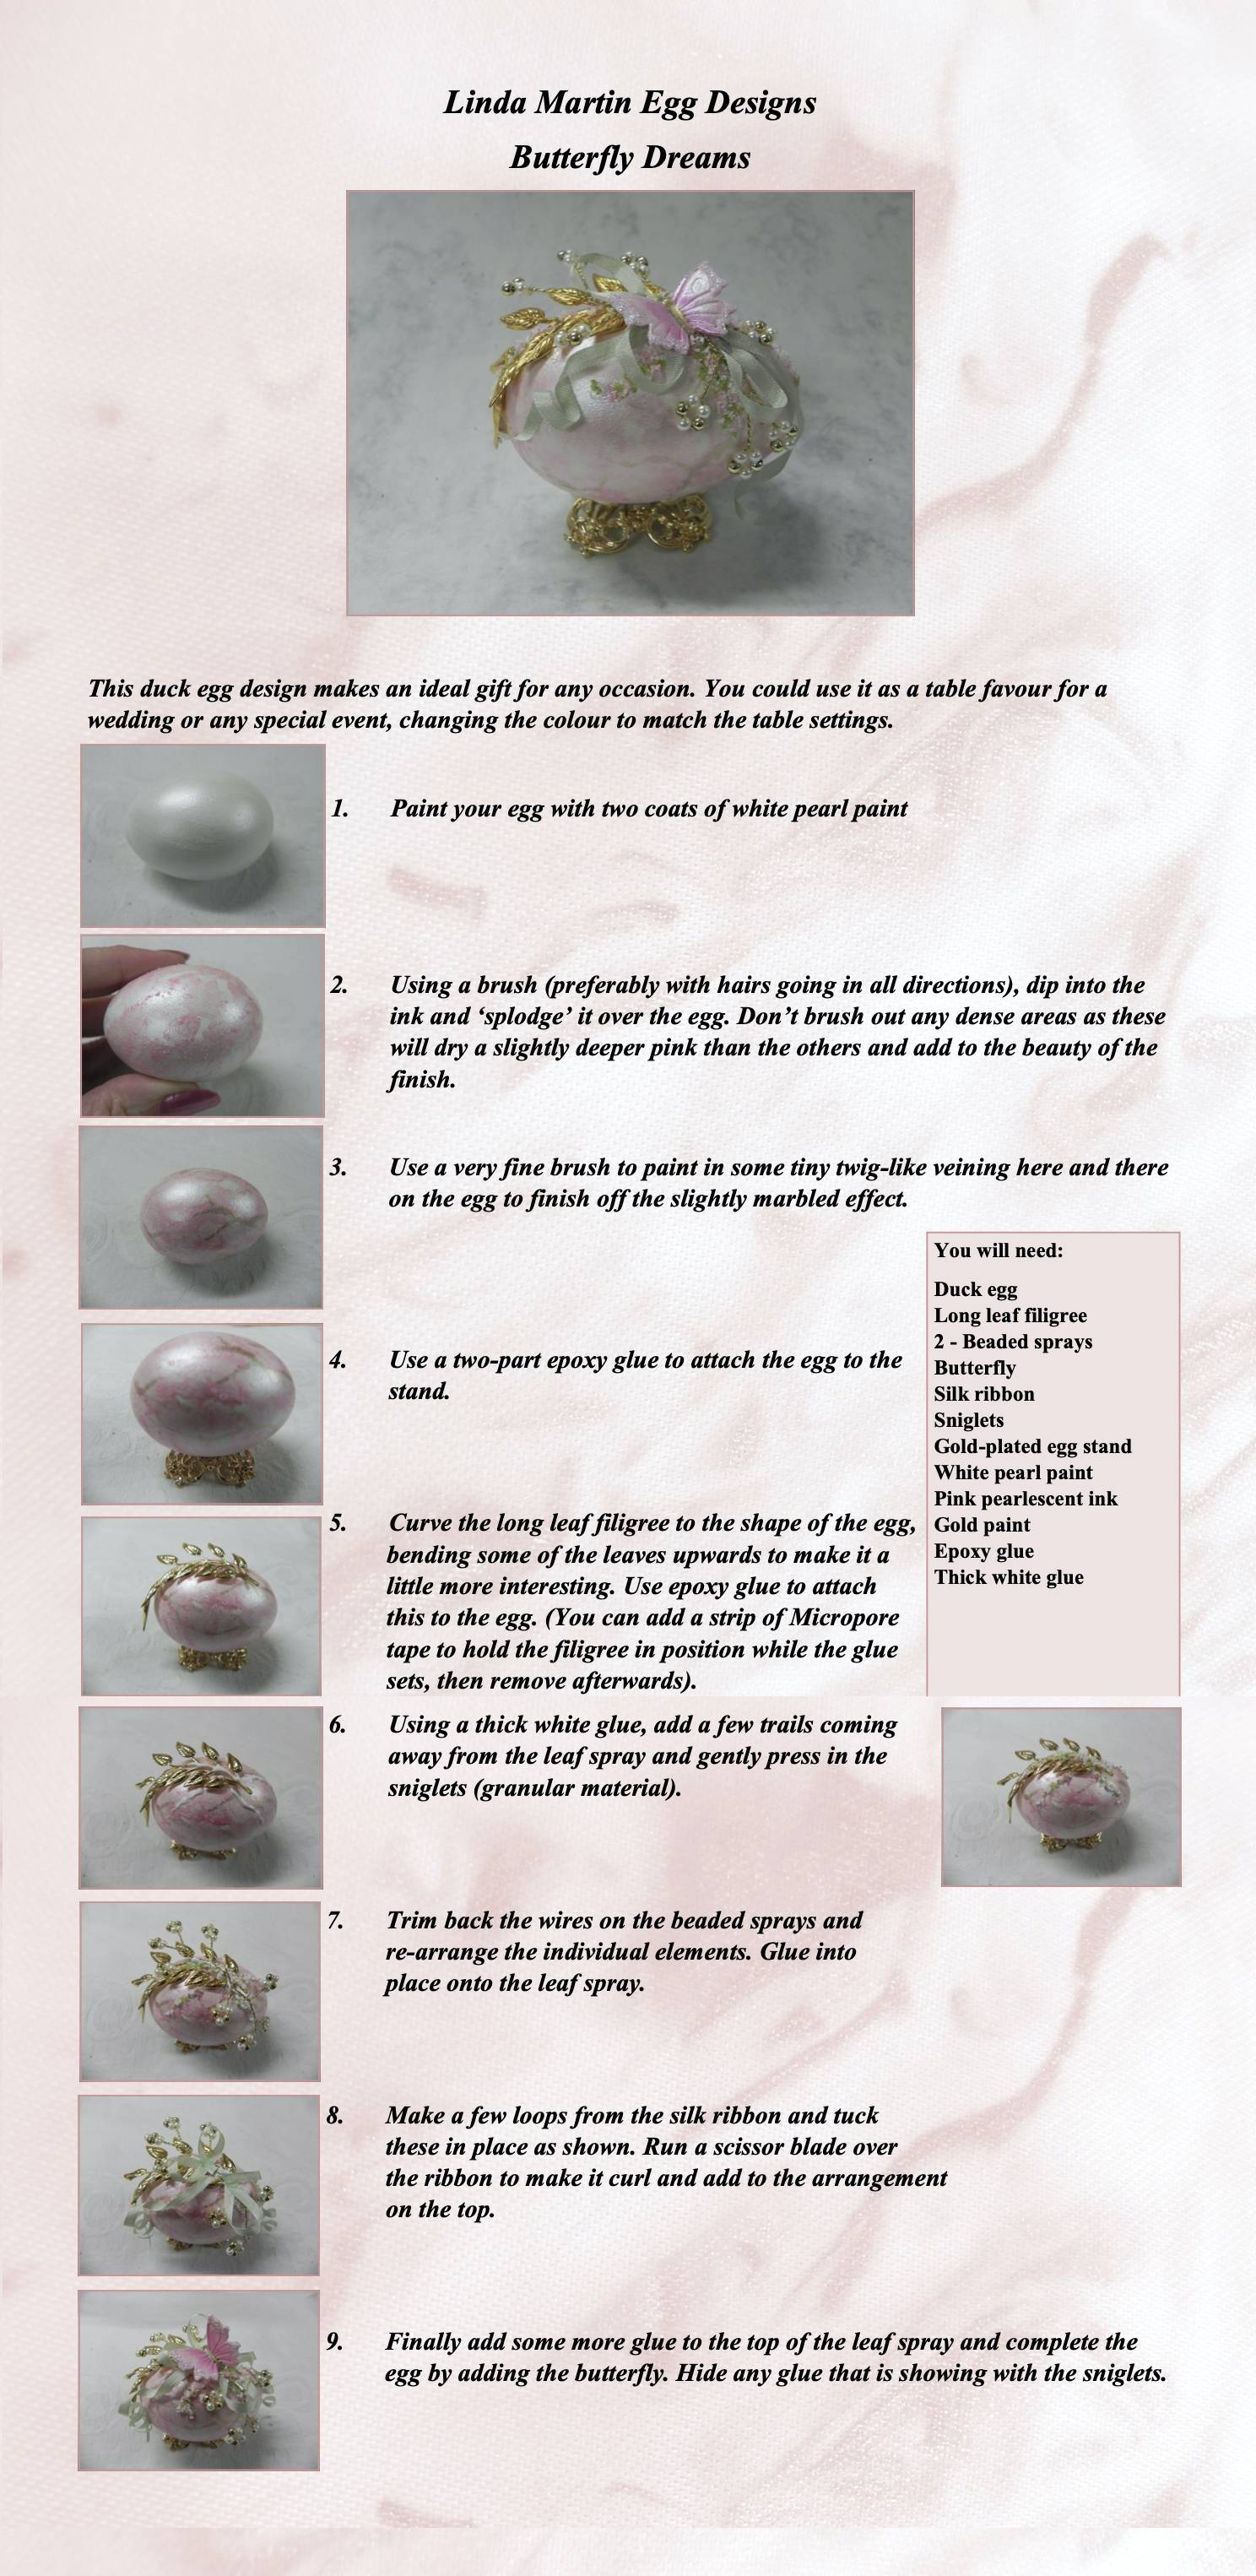
Photo credit: lindamartineggdesigns.com
Betsie “eBetsy” Bolger is a freelance writer/editor, former eBay Education Specialist, and Top Rated Seller on eBay. She sells new, estate, vintage, and artisan jewelry for a client’s account as well as Converse sneakers, vintage jigsaw puzzles, limited-edition Teddy the Dog merchandise, and select consignment items in partnership with her husband. Betsie is also a longtime WorthPoint fan who previously wrote WorthPoint’s commercial spots for eBay Radio. Find her via ebetsy.com, acquisatory.com, and TexAnnasAllStore.com.
WorthPoint—Discover Your Hidden Wealth®
